A wire is a cylindrical piece of metal that can range in diameter from a few millimetres to several centimetres; it is flexible and can be bent or coiled. Both mechanical and electrical uses of the term "wire" are acceptable. While a Guy-wire is an example of a mechanical wire, electrical wiring is the focus of this guide.
Wire used for electricity is essential to modern life. Home wiring allows for the operation of electrical appliances such as lights, stoves, and telephones. Electricity can be transmitted from one location to another through the use of wires. The metallic core of most wires is encased in insulation. Insulators are substances that do not allow electric current to flow freely due to the presence of static electricity. There is no such thing as a perfect insulator. Glass, paper, and Teflon are excellent electrical insulators because they have a high resistivity. Insulation is necessary because touching a bare wire can cause electricity to flow inadvertently through the body (which is dangerous) or to another wire.
Removing a wall or ceiling often results in exposed wiring. If the wires or circuit cable are not going to be used to power new outlets, light fixtures, or other fixed devices, then you'll need a plan for getting rid of them. Disconnecting the wiring from its power source and removing all of the wirings is the safest way to retire it from service, ensuring that it won't cause confusion or harm to any future remodelers. However, if you don't want to cut off the circuit completely, or if pulling the cable out is too much of a hassle, you can terminate the cable inside a junction box without risking any damage to the wires or the box itself.
The safest, most effective, and code-compliant method for dealing with live electrical wires is to terminate and cap them in inaccessible electrical boxes. All splices and terminations must be made in junction boxes that are visible and accessible from the finished surface.
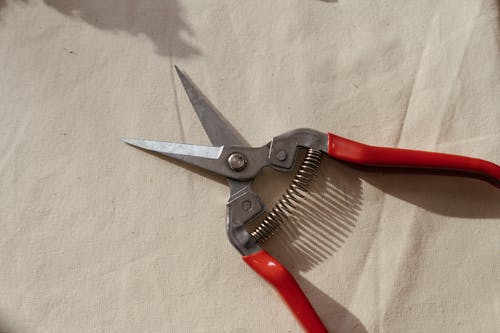
Commonly used in electrical work, needle nose pliers also go by the names pinch nose and long nose pliers. This is a common tool for electricians and DIYers working on wiring-related electrical projects. Though typically employed for grasping, needle-nose pliers can also be used for severing very fine wires. It's important to remember certain procedures and safety measures when using this tool to sever wires.
Top Metal fabrication company Melbourne

Table of Contents
How to select the best pliers?
There is a wide variety of needle nose pliers available, each with a unique cutting edge angle. Before buying pliers for electrical projects, it's important to be aware of the three different types available (standard, semi-flush, and flush). The names are shorthand for the degree of pinch at the wire's ends after they've been snipped.
When the shock being transmitted to the wire and the pinch left on the tip of the wire after cutting are not major concerns, standard cutting edge angles are ideal. Cutting edges that are only partially flush are used to dampen the blow. Applications that call for minimal shock transmission often make use of flush edges.
Not all wire-cutting tasks can be performed securely with any pair of needle-nose pliers, so it's important to keep the above in mind. If you're looking for a cutter that will save you money and still get the job done, look no further than the flush cutter. These cutting edges also lessen the shock that travels through the wires, which prevents many pieces of debris from becoming airborne. But semi-flush edges are much more cost-effective and secure in electronic assembly operations.
What are the steps to make it?
Turn Off the Circuit Breaker
Turn off the breaker for the circuit in your home's service panel to turn off the electricity to the circuit (breaker box). The power should be off if you have been tearing down a wall or ceiling, but you should still check that the appropriate circuit breaker is turned off for the cable you will be terminating. Put a piece of electrical tape over each circuit breaker switch to make sure no one, including yourself, can accidentally turn it on.
Test for Power
Get back to the workshop and use a non-contact voltage tester on all the wiring you plan to touch. Put the probe of the tester on each wire's end and the cable's jacket on all sides. As far as the tester is concerned, there shouldn't be any voltage present. Once you've returned to the service panel and turned off the appropriate breaker, retest the wiring to make sure there is no voltage present.
Choose a Junction Box Location
Select a spot that allows the circuit cable to enter the junction box and extend out the front of the box by at least 8 inches.
Cut the Box Opening
Place the front of the box against the surface of the wall or ceiling where you want to install the box, and use a pencil to trace around the box's perimeter. Use a drywall saw to carefully follow the drawn line.
Use an old-work or remodelling box, which fastens to the drywall with wings that grab the back of the drywall, if you can't easily reach a wall stud or ceiling joist to anchor the new box to the structure.
Check out Austgens WELDING
Feed the Cable Into the Box
The wire must be threaded through the hole in the box. If there are a lot of extra cables, cut them so that only about 8 inches of cable protrude from the front of the box after installation. Using a flat-head screwdriver, carefully pry up the clamping tab covering one of the holes in the back of the box. Simply feed the cable through the opening. If the box doesn't have its own clamping tabs built in, you can use a cable clamp to keep the cable in place.
Install the Junction Box
Place the container in the opening so that its front edge is even with the surrounding wall or ceiling. If necessary, extend the cable so that it protrudes about 8 inches from the front of the container.
To secure an old tool box to the wall, tighten its two mounting screws until the box's wings pull forwards and the box is snug against the wall. Use caution when tightening these screws by hand so you don't strip the heads or break the wings.
Attach the box to the wall or ceiling framing using the screws or nails provided if you are using a standard or "new work" box.
Prepare the Wires
Strip back the sheathing and cut off the excess with the utility knife or scissors after you have cut the cable sheathing with the cable ripper a few inches from the cable's end. Since none of the gadgets connected to the wiring will require electricity, there is no need to remove the insulation from the wires. If the ends of the wires are tangled, however, you can snip them back until you reach a smooth area.
Cap the Wires
Put connectors or nuts on the ends of the wires to keep them together. Pick the right-sized nut and twist it clockwise as you push it onto the wire to ensure a secure hold. Put some pressure on each nut and make sure it's tight.
Electrical tape can be used to secure each nut to its respective wire, and then to secure the wires together. The termination of bare copper ground wires is not required.
Install the Box Cover
The wires should be gently accordioned and pushed into the container. Make sure the wire nuts don't come loose. Screw a blank (no-holes) cover onto the electrical box.
The power can be turned back on in the circuit without further risk.
Working with wire requires a workbench that is equipped with more tools than may be immediately apparent. MacGyvering your way through a project can be entertaining, but in the end, you'll get better results if you just use the right tools. This is why it's so crucial to know the distinctions between various types of wire tools like strippers, cutters, pliers, and crimpers.
American Wire Gauge is a standard for measuring the diameter of single, solid, round electrically conducting wire (AWG). Some wire tools make use of AWG sizing standards to help you select the right one for the job. For AWG, a higher gauge number indicates a thinner wire. One mil is equivalent to 0.001 inch in this system, which uses a circular mil system.
What is a wire stripper?
Electric wires' insulation is removed with wire strippers so they can make contact. The two most common kinds are automatic and manual. Both the destructive method of biting off the insulation, which can cause pain and a hefty dental bill, and the more time-consuming method of using scissors are available. The latter two options are not ones we advocate.
A manual wire stripper works like a pair of scissors but has a notch in the middle where the wire can be placed. The wire's outer insulation is stripped away while the wire itself remains unharmed as the stripper is rotated around the wire.
To avoid twisting while stripping wires of different AWG sizes, some wire strippers feature notches of varying sizes. In addition, wire strippers that operate automatically are available. They're designed to strip insulation from wires while gripping them firmly. While an automatic stripper eliminates much of the manual labour, it also has the potential to damage more delicate wires. It's important to choose a stripper that's easy to hold, safe for the wires, and effective at removing insulation.
Check out Austgens ALUMINUM FABRICATION
What is the easiest way to strip wire fast?
Do it yourself maintenance projects often begin with stripping the sheathing from the wire, whether you're rewiring an old lamp, installing a new doorbell, or adding another outlet to a wall. This may seem like a daunting introduction to electrical work, but mastering the basics is relatively simple. You can get by just fine without any specialised equipment if you put in the time and effort to learn how to do the job properly. If you know how to strip wire, you can use that skill for a variety of home wiring projects.
There is usually some sort of plastic or other insulating material around the wires and cables to prevent them from being damaged by heat or electricity. The wires' insulation must be removed before they can be put to any practical use.
Swift wire stripping is a little tricky to accomplish. The wires can have their insulation removed in a number of different ways.
While some procedures can be completed quickly, others take much longer. Obviously, not all of them are equally efficient.
The length, diameter, and quantity of wires you need to strip will determine the approach you take.
Whether you intend to use the tripped wires for personal or commercial purposes is a key factor in determining the approach you take.
These are the various methods you can use to expose the wires inside of a device. Less-effective methods are discussed first, followed by more-effective ones.
What are the ways to strip wire fast?
The sun warming method
This technique can only be used during intense, brief periods of direct sunlight. The summer is the only time this is feasible.
Since plastic is used to make the majority of insulation, exposing the wires to the sun may help break down the plastic and make it easier to work with. Because of this, it's more feasible to accomplish.
After the wire has heated up and become pliable enough, remove the insulation by pulling on it. However, the method may not work on heavily insulated cables and wires.
The sun-warming method can be used in conjunction with others, such as cutting or a manual wire stripper.
Boiling method
You will need the following items to strip wires using this heating method.
- A metal barrel
- Water
- Firewood
Heating is the first option for removing plastic insulation from your cables. You'll need a metal barrel, some water, and some firewood to implement the heating method.
Put the barrel on the stove and bring the water to a boil. Then, dip the insulated wires in the water. The best place to do this is in the open air.
Give the wire at least 10 minutes in the boiling water.
Pull the wire out of its insulation to remove it. It's best to get this done as soon as possible after you take it out of the water, rather than waiting until it's cold and stiff again.
One must exercise caution to avoid scalding or burning. Thicker wires are more difficult to scrape with the heating method. The boiling process also creates potentially harmful byproducts, such as noxious vapours.
Don't resort to fire to extract the cables; the wires are insulated. Destroying the environment by burning plastic cables is a bad idea. Doing so might land you in legal hot water. Wires are also damaged and degraded by fire.
Check out Computerized Design in Sheet Metal Fabrication Melbourne
What are the different cutting methods?
These are the items you will need for this method.
- Cutting blade
- Thick gloves
The blade or knife you use must be razor sharp. Protect your hands from scrapes and bruises by donning a sturdy pair of gloves before beginning any cutting. Assuming you only have a few wires to strip, this technique is impractical.
The materials for this strategy are simple to find, and the implementation is straightforward. Although you can strip a few cables at a time, this is still a time-consuming process. In other words, it moves at a snail's pace.
First, you'll need to mark the point or length of wire you want to cut off. Then, hover the knife or blade over the desired shopping area. Apply pressure and twist the wire to adjust.
With each revolution of the wire, the blade slices through the protective coating. If you don't want to sever the wire inside, press it gently. Once the bare wire is visible, simply grab the cable's end and peel back the insulation. Your hands or pliers will work fine to hold onto it.
Using a homemade tabletop wire stripper
Items you need are:
- Wooden board
- Pliers
- 2 Screws
- Cutting blade
- Gloves
There are a number of approaches you can take to building your own manual wire stripper for use on a desk or table. You can't get much simpler than this. Using the materials listed above, you can whip one up in your own garage in no time.
If you only have a few wires to strip, a homemade stripper may be all you need. You probably already have everything you need lying around the house or in the garage to make this yourself. You can learn how to make one by watching the video provided in the following link.
Check out Custom Metal Equipment Design and Production
Using a manual wire stripper
If you need to quickly remove insulation from wires or cables, this is a good option. Typically, they are manual and can be used on a tabletop, which is convenient if you have a large quantity of wires to strip.
No electricity is used in their homes. There is a wide selection of wire strippers available; pick one that best suits your needs and budget.
The manual wire strippers have movable blades and are powered by a hand-held motor. If the blades wear out after some time, you can replace them.
Using the electric wire stripper
The most effective tools for removing insulation from wire are electric ones. Whenever you have a large number of wires that need to be stripped, they shine.
There is a small price premium for electric wire strippers over their manual counterparts. If you intend to strip wires commercially, such tools are worth the investment. Although they are most commonly used by recyclers, they can also be purchased for personal use.
Before using the machine, make sure you've read all of the included documentation. All wires, no matter what their size or shape, can be efficiently stripped with this tool.
How to cut without wire strippers?
Don't get down on yourself if you don't have the right equipment. To strip wire, all you need is a tool that can cut through the protective covering without damaging the wire itself, such as a utility knife, scissors, or even a pocket knife. It's essentially the same process, though it takes some experience to learn how much pressure to use to remove the insulation without nicking the metal conductors.
When working with a utility knife
Spread the wire out on a flat surface, like a workbench or a plank of wood. To remove the sheathing from a wire, hold the utility knife so that the blade is resting gently on the sheathing at the point you want to cut. To ensure the blade scores the sheathing completely around the wire, roll the wire across the work surface with your other hand. Remove the covering by pulling it off with your fingers, and then check the bare wire for breaks.
When working with a scissors
To thread your wire through the scissors, open them up to their full extent and position it as close as you can to the joint between the blades. Slowly start to close the scissors; you want to bite into the sheathing, not the wire. To ensure the entire sheathing is cut by the open scissors, twist the wire with your fingers. To remove the end sheathing, first unzip it.
Truthfully, it's as easy as that. Remember to take your time and be careful not to nick the insulation or wiring that lies beneath the sheathing as you work. As a last resort, you can simply cut the wire and try again. With some training, focus, and a steady hand, you can learn to strip wire for any do-it-yourself electrical project with ease and precision.
The size, length, and quantity of wires you have will determine the method you use to strip them. To quickly strip wires, however, you can use a combination of techniques.
What are the safety precautions before cutting wires?
Wear goggles when working with metal wires. The cut wires may still fly off during the cutting process, even if the needle-nose pliers have a flush cutting edge. Your eyes should always be protected from such dangers. Be sure to check the condition of the blades every time before you use them to cut anything. The number of accidents will go down if the blades are effective.
Even though the needle-nose pliers have cushioned handles, that is no guarantee that the user will be safe from electric shock. Under no circumstances should you cut any wires, no matter how low the voltage. Turn off the power switch before severing any wires.
Conclusion
A wire is a flexible, coiled, cylinder-shaped piece of metal with a diameter of a few millimetres to several centimetres. Lights, stoves, and phones are just some of the modern conveniences made possible by electrical wiring. Because accidental contact with a bare wire can result in the flow of electricity through the body or to another wire, insulation is essential. Terminating and capping live electrical wires in sealed electrical boxes is the safest, most efficient, and code-compliant solution. It is important to remember certain procedures and safety measures when using needle nose pliers, a common tool for electricians and DIYers working on electrical projects involving wiring.
It's important to know the difference between standard, semi-flush, and flush needle nose pliers when shopping for electrical work. Semi-flush edges are more cost-effective and secure in electronic assembly operations, while standard cutting edge angles are best for minimising shock transmission. When checking for power, turn off the breaker and move the junction box so that the cable entering it can protrude 8 inches from the front of the box. You can use the front of the box as a template by holding it up to the surface of the wall or ceiling where you intend to mount it, and then tracing the box's outline with a pencil. If you need to mount something to a wall stud or ceiling joist but can't get to it easily, try using a box designed for remodelling or old-work projects.
Using a flat-head screwdriver, feed the cable into the box, and if the box doesn't have its own clamping tabs, secure the cable with a clamp. After the opening has been prepared, the Junction Box can be installed by inserting the container into the hole until the front edge is flush with the surface it is being installed into (usually the ceiling or wall). Pull the wings of the old tool box forwards and snug up against the wall, then tighten the two mounting screws. Make the Wires ready by removing their sheathing and trimming any excess with the utility knife or scissors. Snip back the tangled ends of the wires until you reach a smooth spot.
Cap the Wires. A wireworker needs a variety of tools, including strippers, cutters, pliers, and crimpers, on their workbench. When referring to the diameter of a single, solid, round electrically conducting wire, the term "American Wire Gauge" is used (AWG). A manual wire stripper is similar to a pair of scissors, except it features a notch in the centre. As the stripper is rotated around the wire, the outer insulation is removed without damaging the wire itself.
Try your hand at it Taking the sheathing off the wire is a common first step in many maintenance projects, and once you get the hang of it, everything else is a breeze. It is important to choose a stripper that's easy to hold, safe for the wires, and effective at removing insulation. There are a number of approaches to exposing the internal wires of a device, and quick wire stripping is one of the more challenging methods. Only during intense, brief periods of direct sunlight is the sun warming method effective in potentially breaking down the plastic and making it easier to work with. Cables' plastic insulation can be stripped using the sun-warming method, but other methods, such as cutting or a manual wire stripper, can also be used.
A metal barrel, water, and firewood are needed for the heating method, and the wire needs to be immersed in the boiling water for at least 10 minutes before the insulation can be pulled off. Toxic fumes and other byproducts may be produced during the boiling process. You won't have any trouble tracking down the necessary components, and putting this plan into action will take mere minutes. Manual wire strippers, which are manual and can be used on a tabletop, are the most effective tools for removing insulation from wires or cables, while electric wire strippers, which are electric and can be purchased for personal use, are the most efficient tools for removing insulation from wires or cables. Electric wire strippers cost a little more but are well worth it compared to manual wire strippers, which have fixed blades and are powered by a hand-held motor.
This tool is ideal for efficiently stripping wires of any size or shape. The most crucial information is that a tool like a utility knife, scissors, or a pocket knife is required to strip wire because it can cut through the protective covering without damaging the wire itself. Spread the wire out on a flat surface, hold the utility knife gently on the sheathing, roll the wire across the work surface with your other hand, and check the bare wire for breaks to see if it needs to be repaired. Open the scissors all the way and place the wire as close as possible to the hinge. Never cut any wires, ever, no matter how low the voltage is. Wear goggles when working with metal wires. It's best to wait until the power is turned off before cutting any wires.
Content Summary
- While a Guy-wire is an example of a mechanical wire, electrical wiring is the focus of this guide.
- Wire used for electricity is essential to modern life.
- The safest, most effective, and code-compliant method for dealing with live electrical wires is to terminate and cap them in inaccessible electrical boxes.
- There is a wide variety of needle nose pliers available, each with a unique cutting edge angle.
- Before buying pliers for electrical projects, it's important to be aware of the three different types available (standard, semi-flush, and flush).
- Not all wire-cutting tasks can be performed securely with any pair of needle-nose pliers, so it's important to keep the above in mind.
- But semi-flush edges are much more cost-effective and secure in electronic assembly operations.
- Select a spot that allows the circuit cable to enter the junction box and extend out the front of the box by at least 8 inches.
- Place the front of the box against the surface of the wall or ceiling where you want to install the box, and use a pencil to trace around the box's perimeter.
- Use an old-work or remodelling box, which fastens to the drywall with wings that grab the back of the drywall, if you can't easily reach a wall stud or ceiling joist to anchor the new box to the structure.
- Simply feed the cable through the opening.
- Place the container in the opening so that its front edge is even with the surrounding wall or ceiling.
- Attach the box to the wall or ceiling framing using the screws or nails provided if you are using a standard or "new work" box.
- Cap the Wires
- Put connectors or nuts on the ends of the wires to keep them together.
- The wires should be gently accordioned and pushed into the container.
- Make sure the wire nuts don't come loose.
- This is why it's so crucial to know the distinctions between various types of wire tools like strippers, cutters, pliers, and crimpers.
- Some wire tools make use of AWG sizing standards to help you select the right one for the job.
- Electric wires' insulation is removed with wire strippers so they can make contact.
- In addition, wire strippers that operate automatically are available.
- It's important to choose a stripper that's easy to hold, safe for the wires, and effective at removing insulation.
- If you know how to strip wire, you can use that skill for a variety of home wiring projects.
- The length, diameter, and quantity of wires you need to strip will determine the approach you take.
- Boiling methodYou will need the following items to strip wires using this heating method.
- You'll need a metal barrel, some water, and some firewood to implement the heating method.
- Give the wire at least 10 minutes in the boiling water.
- Pull the wire out of its insulation to remove it.
- Thicker wires are more difficult to scrape with the heating method.
- Using a homemade tabletop wire stripperItems you need are:Wooden board Pliers 2 There are a number of approaches you can take to building your own manual wire stripper for use on a desk or table.
- Using the materials listed above, you can whip one up in your own garage in no time.
- If you only have a few wires to strip, a homemade stripper may be all you need.
- Using a manual wire stripperIf you need to quickly remove insulation from wires or cables, this is a good option.
- The most effective tools for removing insulation from wire are electric ones.
- Don't get down on yourself if you don't have the right equipment.
- To strip wire, all you need is a tool that can cut through the protective covering without damaging the wire itself, such as a utility knife, scissors, or even a pocket knife.
- Remove the covering by pulling it off with your fingers, and then check the bare wire for breaks.
- To ensure the entire sheathing is cut by the open scissors, twist the wire with your fingers.
- To remove the end sheathing, first unzip it.
- As a last resort, you can simply cut the wire and try again.
- To quickly strip wires, however, you can use a combination of techniques.
Frequently Asked Questions
Cable and phone wires don't carry current, so it's safe to remove them. However, it's critical not to cut into a power line, as you know. The first step is to be sure you know the difference.
Use the correct pliers or wire cutters for the job. Proper use of side cutting (lineman's) pliers: Many applications, including electrical, communications and construction work. Use to grip, splice or cut wires and strip insulation.
It's possible to use a hacksaw to cut the wire if no cutter is available. You'll want to use a blade with a high teeth-per-inch (TPI) count for as clean a cut as possible. Regardless of the TPI count, using a hacksaw to cut wire is difficult unless the wire has a large diameter.
If you suspect that an electric cable has been hit, it is absolutely necessary to repair it. You should immediately ensure that the power is switched off before touching anything. In the worst case, if the protective earth conductor has been damaged, you otherwise run the risk of a fatal electric shock.
If the live wire touches the metal casing accidentally, current will flow through the casing, and the user touching the casing will get an electrical shock.