Are you a welder looking to step up your game and take your skill level to the next level? Look no further! In this blog post, we'll be covering everything you need to know about welding. From tips for improving technique and stabilizing accuracy, to learning about different welding processes and materials; we have it all here. We understand that learning how to weld can seem intimidating at first, but with the right guidance from experienced professionals, you'll soon find yourself confidently mastering the craft – so don't worry! Read on as we provide essential lessons any aspiring or practicing professional welder should know in order to improve their skills.
Austgen Melbourne metal fabrication
Table of Contents
How to improve MIG welding?
Keep in mind that a safe MIG welder is the best welder.
Never lose sight of the fact that unsafe welding poses serious risks. Such dangers include electric shock, heated components, arc rays, gases and fumes, noise, and more. In addition, eyes and skin can be damaged by UV and IR radiation, which is similar to sunburn but doesn't lead to a tan. Because of this, staying safe is a top priority for the most skilled MIG welders.
By adhering to a few basic guidelines, you can make your MIG soldering as safe, efficient, and professional as any other shop.
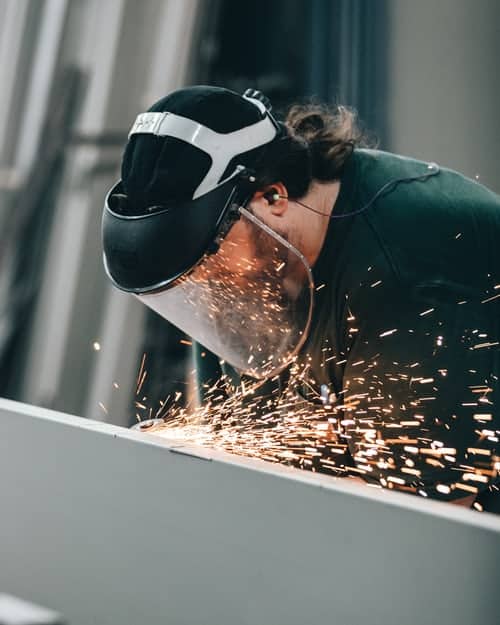
Wearing protective gear such as a welding helmet, gloves, closed-toe shoes, and full-coverage clothing is mandatory. Denim or leather are good examples of flame-resistant natural fibres to wear, but synthetic fabrics, which could melt if hit by spattering, should be avoided. In addition, wearing sleeves or pockets on your pants or shirt increases the risk of injury.
Keep in mind that while massive Arc welding takes less skill than other types of welding, it nevertheless often results in a lot of heat, sparks, and spatter. Hence, it is prudent to use thick, rigid leather gloves, which offer a greater degree of protection. Similarly, wear shoes that cover your full foot and have a high top so that fewer splatter lands on your ankle. Often, the safest footwear is a pair of high-top leathers and work boots.
Finally, always verify the Datasheet for the metals being welded and the filler metal being used, and make sure there is appropriate ventilation as per OSHA standards. When the Datasheet calls for a respirator, use one.
Research before setting up your equipment.
Get in touch with a reliable filler metal producer or do some preliminary web study to learn the finest procedures for working with the wire you have. By doing so, you will learn the optimal wire feed speed, amperage, and voltage, as well as the most compatible shielding gas, as indicated by the manufacturer for your wire diameter. In addition, the manufacturer will specify the optimal electrode extension or contact-to-work distance for each wire.
Don't forget that if your stick out is too long, your welder will be cold, and your amperage will decrease, reducing the joint's penetration. Therefore, to get a more consistent arc and deeper low-voltage penetration, the optimal wire stick-out length is usually the shortest one permitted by the application.
Before starting, check your connections.
Ensure the power pin connecting the MIG weapon towards the power supply is securely fastened before you begin welding. You should also have a grounded cable installed as close to your workspace as feasible and take care to prevent splatter from accumulating on your supplies.
Ensure the power pin connecting the MIG weapon towards the power supply is securely fastened before beginning welding.
Connect the ground cable up to the weldment wherever you can. If this is not an option, you can secure it to a nearby bench. But keep in mind that the nearer it is to the arcs, the better. Overheating the gun due to the unreliable ground might reduce the contact tip's useful life and compromise the weld's quality.
Also, use clean compressed air to blow out the liner and remove any debris or welding wire shavings that have accumulated there regularly.
Choose the right drive roll and tension to feed the wire.
Poor wire feeding might result from using the wrong drive rolls or adjusting them at the wrong tension. Before selecting the proper drive roll, think about the wire's size and material.
Because of the flux within and the tubular construction, flux-cored wire is more delicate and necessitates a shaft drive roll with teeth to grip the wire and aid force it through. Nevertheless, the solid wire should never be fed through knurled drive rolls since the teeth will shred the wire, resulting in blockages in the liner and increased resistance. Instead, drive rollers with a V- or U-grove should be used in this situation.
The tension can be adjusted to the desired level by letting up on the driving rolls. Then, while putting the wire through your gloved hand, tighten it until it is a half-turn past the point where your hand can no longer keep it from slipping.
To prevent cable kinks that could result in improper wire feeding, it is important to keep your gun as flat as possible.
If you want the best results, make sure you’re using the appropriate contact tip recess.
Since this consumable transfers the welding power to the wire as it travels through the bore, forming the arc, it can considerably affect MIG welding performance.
The interaction tip recess, where the tip sits inside the nozzle, is equally crucial. Spatter, porosity, poor penetration, burn-through, and warping can all be mitigated by adjusting the location of the contact recess.
Although the contact tip recess location depends on the application, it is generally accepted that as the electrical current increases, this recess also must increase.
Choose the gas that will provide the most effective protection for your wiring.
Know whether your wire calls for pure carbon dioxide, argon, or a combination.
CO2 is far less expensive than argon and is effective at penetrating welds on steel; it also runs colder, making it suitable for use with thinner materials. More penetration and a cleaner weld can be achieved by switching to a 75:25 argon: CO2 gas mixture rather than using pure CO2.
For typical wire types, we recommend the following shielding gases:
In addition, using a CO2 shielding gas or even a 75% CO2/25% gas mix is recommended when working with pure carbon steel cable for auto body, manufacturing, and fabrication applications; this is especially true in areas with no wind.
Stronger welds and simpler feeding are benefits of aluminium foil, which requires inert argon gases.
Check out Austgens PRESSING & STAMPING
How Can You Get Better at Stick Welding?
Welding requires a clear view of the object being welded.
Lenses on a welding mask and helmet that are unclean or scratched should be replaced. Maintaining a spare pair of lenses increases the likelihood that you will replace broken ones when the time comes.
If you're like me and don't always have a spare pair of lenses, you could be tempted to use your worn-out lenses for one more job, promising yourself that you'll buy a new set when they finally give out.
So, when we're done with a welding project, we put the helmet back on the shelf and forget about it until we do the next one.
You should probably acquire a new welding helmet entirely. But first, did you use a less expensive or older model? If so, you should try out a high-end helmet with only an adjustable shade and an expanded field of view.
Be sure a magnifying glass can be installed in your helmet if your eyesight isn't what it used to be. Click here to read about the top ten welding helmets for novices.
If you can't see the weld pool well, your welding experience and quality will suffer.
What are the benefits of understanding your equipment?
If your welding equipment only operates on AC power, you must stick with the default polarity. Learn the advantages and disadvantages of using an AC/DC welder if you have one.
Direct current, or DC, allows the welder to choose between a straight or reverse polarity. It means the current's electrons can only move in one direction. Only in one direction at a time, unlike AC, which flows in both directions at once.
There are three possible polarities; which one do you think will work best for the task?
It's important to remember that alternating current (AC) is not a polarity in and of itself because it flips direction 60 times every second.
A/C should only be used when it’s necessary.
If you're stuck with AC, use rods designed for that type of welding. Welding on magnetic metal requires using the AC setting, if available.
Tubing and rods from rod water and oil well are excellent examples of magnetic metal. A few cycles of the rods up and down in the tubing per minute will provide enough friction to magnetize the steel rapidly.
Magnetization iron tends to blast or push molten metal off the welding pool once it has liquefied. Welding with AC allows for more precise manipulation of these parameters.
In any other case, most welders who have the choice will use DC for most of their welding needs. This is because it's less of a hassle to strike and maintain an arc, and the resulting welds are cleaner, more uniform, and less prone to spatter.
Learn the benefits of each DC polarity and how to choose the right one.
The DC option makes it relatively simple to grasp what is going on during welding, as the direction of the current flow is indicated. However, some people may be confused by the fact that the industry utilizes two sets of names to describe its two environments.
Polarity can be distinguished in two ways: straight and reversed. The other is polarity, which can be positive or negative. Unfortunately, the second explanation could be less natural to most people.
When discussing polarity, the terms "straight", "positive", "reversed", and "negative" all refer to the same direction. We'll continue to use the phrases "positive" and "negative" to describe the settings, as these correspond to the + and - symbols seen on most DC machine dials.
The majority of welders also prefer DC+ for most of their work. To complete the circuit, current must travel from the machine to a base metal, then to the electrode, and then back to the machine.
As the current will be generating the most heat in the base metal, it makes sense to run it first. That's a good way to get deeper into the market.
When the polarity is flipped to DC-, electricity flows in the other direction, from the machine thru the electrode to the base metal and back again.
This adjustment increases the amount of heat reaching the electrode. Because of this, there will be less of an effect on the target. Welding thinner metals with less burn-through is made easier by the increased electrode burn-off that results from this process.
You should be familiar with your electrode’s optimal amp/current value.
Welding rods with a diameter of 1/8 inch are the most used size. So. We are using this rod size as a benchmark to determine the optimal beginning amperage for our application. One amp for every.001 inch of rod diameter is a good rule of thumb if the rods don't state otherwise.
One-eighth of an inch is the diameter of a rod. So, 125 amps is an appropriate amp value, to begin with. Then, change the setting by 5–10 amps until you reach the optimal level.
Learn the right arc length.
While welding, the arc length is measured from the rod's tip to the pool. Using the same 1/8" rod as before, this general guideline generally keeps the arc at 1/8", the same distance as the rod length.
Remember that the length of the rod's metal part matters most; subtract the flux from the total diameter to get the rod diameter.
The rod will stick more often and weldless effectively if the length is too short. The longer the time, the more spatter you'll generate and the less metal you'll deposit in the weld.
Check out Optrel e680 Auto-Darkening Welding Helmet Review
Keep your rods at the right angle.
When welding in a horizontal or above position, tilt the rod so its top points in the direction you want to weld. This angle is around ten degrees. Drag or backhand are some names for this strategy.
Tilt the rod by the same ten degrees but in the reverse direction of both directions of motion when soldering vertically and uphill. It's also called a forehand or pushing stroke.
Visualize a tea straw resting on the edge of your glass to approximate the ten-degree angle, which should be within +/- ten degrees.
Learn the proper method for adjusting the rod’s tip.
During welding, the rod tip and, by extension, the pool can be moved in several ways. A constant drag with no horizontal movement imparted here on the tip is most effective for metals 14" thick or less.
In some cases, making a T weld by moving in a quarter or L shape is preferable. To do this, you should work the rod up the vertical section while drawing the puddle forward slightly as you lower the rod's tip to the horizontal section.
Then, after a brief up-and-back motion, move the tip down and forward. Only when welding larger metals would this be required? Be wary of undercutting the prices of the less valuable metals.
To create a wider weld on thicker, flatter metal, some welders produce a Z design or, indeed, a tractor-trailer pattern using the rod tip. The pause and drag technique involves not moving the rod's tip laterally while keeping it parallel with the weld.
How Fast Should You Weld?
The rate of travel is crucial. Poor penetrating and the potential for developing holes and cracks or porosity result from excessive velocity. Inadequate bead width, poor deposition, and undercutting of the base metals are also common issues.
Very little forward momentum causes overlap, also known as a chilly lap. It forms due to an excess of deposition and a lack of penetration. Instead of blending in with the base metal, the weld floats above it.
It's possible that the weld's edges won't have a nice, uniform tie-in.
Do You Need to Ensure That Your Electrodes Remain Dry?
Moistened rods will not weld well since they have absorbed the humidity in the air. The arc may be choppy and unreliable if the rods are wet. Even if you're using the proper polarity and an amperage within the range indicated for the rod you're using, it may be damp if it isn't burning smoothly and consistently.
Fixing this issue requires keeping rods in airtight containers at all times.
If the flux becomes flaky and easily separates from the steel, the electrodes should be thrown away. Many welders will use an old, decommissioned refrigerator to keep their rods from rusting.
This helps prevent moisture from accumulating on electrodes. It's also useful for stowing away anything you want to protect from moisture and dirt. If you're out of dry rods and need to get the job done, try briefly pressing the rod towards the base metal.
As a result, the rod will heat very rapidly, which could assist in removing some of the moisture from the flux. In a matter of seconds, the rod will reach a sizzling temperature. Use extreme caution, as this should be a last resort.
How to Clean Base Metals Before Welding?
Remove any mill scales, wear, dust, dampness, gasoline, etc., and oil from surfaces to be welded to improve the weld quality and reduce the likelihood of porosity. This can be done using the angle grinder and wire wheels, flip rear axle, and a grinding rear axle.
A wire brush might do the trick if the situation isn't too dire. However, if you can't clean the metal, you need to use E6011 rods.
Welding slower and making the pool a little bigger can give any extra gas bubbles time to escape when working with less than perfectly pure base metals.
Run a test.
Using a practice run with the electrode before welding can be quite useful. It's especially important if the spot where the weld will be done is small.
Turning off the electricity allows you to see if there are any obstructions to your line of sight as you travel around the intended weld and determine where your hands will need to go. Find the spots where you're at risk of not maintaining the correct rod angle during welding.
If you're having trouble keeping your sight and technique straight, you might want to stop welding at key spots and reposition yourself. The sooner these hotspots are located, the better.
How Should I Prepare for the Actual Welding Process Before I Acquire Them?
Basic factors to improve results
Stick welding, also known as welding with shielded metal arcs, is among the most challenging techniques to learn, especially for individuals who are new to welding or may not weld regularly. Someone like them, who can grab a scorpion, put in an electrode, and lay down beautiful welds repeatedly, is quite amazing. That's how they make it look, so simple.
But the rest of us might be having trouble understanding. We can avoid this, however, by paying close attention to the current setting, arc length, electrode angle, electrode manipulation, and travel speed. Taking care of these five fundamentals correctly can boost your productivity.
Check out Hobart 770756 Impact Auto-Darkening Welding Helmet Review
Prepare
Gas welding could most tolerate grime and rust, but that's no excuse to skip the cleaning process. Each area to be welded should be cleaned using a scrub brush and a grind to remove any grime, dirt, or rust. If you skip over these procedures, your odds of a successful first attempt at welding are reduced. Splitting, permeability, absence of fusion, and inclusions are all possible outcomes of working in an unclean environment. Be sure to set aside some space for such work clamp while at it. The quality of an arc relies on a reliable electrical connection.
Go into a spot where you can see the weld pool easily. To ensure you're a welder in the junction and keep the arc here on the top edge of both the puddle, it's advisable to tilt your head to the side, away from the weld fumes. Verify that your posture will allow you to hold and move the electrode without difficulty.
Conclusion
Everything you need to know about welding is in this post, from how to stabilise your accuracy and improve your technique to the various welding processes and materials. If you're a novice welder or a seasoned professional looking to hone your craft, this book has the information you need to succeed. Wearing protective equipment like a welding helmet, gloves, closed-toe shoes, and full-coverage clothing is crucial for staying safe while welding. In addition to making sure there's enough airflow, you should check the Datasheet for the materials you're welding and the filler metal you're using. In conclusion, study the area thoroughly before establishing shop.
To find out the best methods for working with wire, you should get in touch with a reputable filler metal producer or conduct some preliminary online research. Make sure the power pin is securely attached and all connections are solid before turning on the device. Whenever possible, connect the ground cable to the weldment, and then use clean compressed air to blow out the liner and remove any debris or welding wire shavings. Consider the wire's size and material when deciding on the ideal drive roll and tension for feeding the wire. Because of its greater fragility, flux-cored wire must be fed through using a shaft drive roll equipped with teeth.
Wire can be shredded by knurled drive rolls, leading to liner blockages and increased resistance. By releasing pressure on the driving rolls and turning the wire with your gloved hand, you can adjust the tension to your liking. Using the correct contact tip recess and keeping the gun as flat as possible can help avoid cable kinks. Spatter, porosity, poor penetration, burn-through, and warping can all be mitigated by adjusting the interaction tip recess, the area where the tip sits inside the nozzle. When it comes to protecting your wiring, either pure carbon dioxide, argon, or a mixture of the two will do the job best.
Aluminum foil, which calls for inert argon gases, has advantages including stronger welds and easier feeding. Lenses in a welder's mask and helmet should be replaced if they become dirty or scratched. There are three different polarities that can be used with an AC/DC welder, as well as information on the benefits and drawbacks of each. In AC, the polarity is always forwards, but with DC, the welder has the option of selecting either a straight or reverse current. Welds made with AC are cleaner, more uniform, and less likely to spatter because it is easier to start and keep an arc going with AC.
Once the metal has melted, magnetisation iron has a tendency to blast or push the molten metal away from the welding pool, so welding rods made for this purpose are recommended. There are two sets of terms used in the business world to describe the two types of settings: straight and reversed. The terms "straight," "positive," "reversed," and "negative" all refer to the same direction when discussing polarity. Since DC+ welding requires current to travel from the machine to a base metal, then to the electrode, and then back to the machine, it is the prefered method of welding for the vast majority of welders. Alternating current (DC) flows in the opposite direction when the polarity is switched to DC-, resulting in a higher temperature at the electrode.
Due to the increased electrode burn-off, thinner metals can be welded with less burn-through. You need to train yourself to use the correct arc length (the distance from the end of the rod to the pool) when welding. To determine the diameter of the rod, remove the flux from the total diameter to focus on the length of the metal section. When welding horizontally or above, keep the rods at the proper angle, tilting the rod so its top points in the direction you want to weld; when welding vertically and uphill, use a drag or backhand strategy. If you know how to adjust the rod's tip, you have a number of options for relocating the pool.
Some welders make a Z pattern or a tractor-trailer pattern with the rod tip to create a wider weld on thicker, flatter metal. The rate of travel is crucial because high speeds lead to poor penetrating and the possibility of developing holes, cracks, or porosity. Overlap, also known as a chilly lap, occurs when there is insufficient forwards momentum. Rods that have been exposed to moisture will not weld smoothly because the arc will be erratic and unstable. The problem can be solved by storing welding rods in an old, decommissioned refrigerator with airtight containers.
Weld quality can be improved and the likelihood of porosity can be decreased by thoroughly cleaning the base metals to remove mill scales, wear, dust, dampness, gasoline, etc., and oil from surfaces before welding. If there are any obstacles in your line of sight as you move around the area where you intend to weld, you can see them by running a test with the electrode and turning off the electricity before you start welding. Stick welding, or welding with shielded metal arcs, is one of the most complex welding methods to master. Adjusting the current, arc length, electrode angle, electrode manipulation, and travel speed can significantly enhance the quality of the results. Scrubbing and grinding away dirt and rust as part of the cleaning process is also recommended. Last but not least, an arc's quality is determined by its electrical connection.
Content Summary
- Are you a welder looking to step up your game and take your skill level to the next level?
- In this blog post, we'll be covering everything you need to know about welding.
- From tips for improving technique and stabilizing accuracy, to learning about different welding processes and materials; we have it all here.
- We understand that learning how to weld can seem intimidating at first, but with the right guidance from experienced professionals, you'll soon find yourself confidently mastering the craft – so don't worry!
- Read on as we provide essential lessons any aspiring or practicing professional welder should know in order to improve their skills.
- Keep in mind that a safe MIG welder is the best welder.
- Never lose sight of the fact that unsafe welding poses serious risks.
- Because of this, staying safe is a top priority for the most skilled MIG welders.
- By adhering to a few basic guidelines, you can make your MIG soldering as safe, efficient, and professional as any other shop.
- Get in touch with a reliable filler metal producer or do some preliminary web study to learn the finest procedures for working with the wire you have.
- By doing so, you will learn the optimal wire feed speed, amperage, and voltage, as well as the most compatible shielding gas, as indicated by the manufacturer for your wire diameter.
- Ensure the power pin connecting the MIG weapon towards the power supply is securely fastened before you begin welding.
- The tension can be adjusted to the desired level by letting up on the driving rolls.
- To prevent cable kinks that could result in improper wire feeding, it is important to keep your gun as flat as possible.
- If you want the best results, make sure you're using the appropriate contact tip recess.
- Spatter, porosity, poor penetration, burn-through, and warping can all be mitigated by adjusting the location of the contact recess.
- Choose the gas that will provide the most effective protection for your wiring.
- You should probably acquire a new welding helmet entirely.
- Learn the advantages and disadvantages of using an AC/DC welder if you have one.
- Welding on magnetic metal requires using the AC setting, if available.
- When the polarity is flipped to DC-, electricity flows in the other direction, from the machine thru the electrode to the base metal and back again.
- You should be familiar with your electrode's optimal amp/current value.
- Remember that the length of the rod's metal part matters most; subtract the flux from the total diameter to get the rod diameter.
- Keep your rods at the right angle.
- Learn the proper method for adjusting the rod's tip.
- The pause and drag technique involves not moving the rod's tip laterally while keeping it parallel with the weld.
- The arc may be choppy and unreliable if the rods are wet.
- Fixing this issue requires keeping rods in airtight containers at all times.
- If you're out of dry rods and need to get the job done, try briefly pressing the rod towards the base metal.
- and oil from surfaces to be welded to improve the weld quality and reduce the likelihood of porosity.
- However, if you can't clean the metal, you need to use E6011 rods.
- Using a practice run with the electrode before welding can be quite useful.
- If you're having trouble keeping your sight and technique straight, you might want to stop welding at key spots and reposition yourself.
- Basic factors to improve resultsStick welding, also known as welding with shielded metal arcs, is among the most challenging techniques to learn, especially for individuals who are new to welding or may not weld regularly.
- We can avoid this, however, by paying close attention to the current setting, arc length, electrode angle, electrode manipulation, and travel speed.
- Taking care of these five fundamentals correctly can boost your productivity.
- The quality of an arc relies on a reliable electrical connection.
- Go into a spot where you can see the weld pool easily.
FAQs About Weldings
If you still can't see the detail you need, most welding helmets now allow for the insertion of a magnifying lens. These relatively inexpensive “cheater lenses” allow welders to view their work with more detail without the need to move closer to the arc and weld plume.
Exposure to infrared light can heat the eye's lens and produce cataracts over the long term. Visible light from welding processes is very bright. It can overwhelm the ability of the eye's iris to close sufficiently and rapidly enough to limit the brightness of the light reaching the retina.
Prolonged exposure to welding fume may cause lung damage and various types of cancer, including lung, larynx and urinary tract. Health effects from certain fumes may include metal fume fever, stomach ulcers, kidney damage and nervous system damage.
When welders don't properly protect their eyes from the arc, they commonly suffer welder's flash, or photokeratitis, a condition caused by exposure to intense ultraviolet radiation resulting in temporary blindness and extreme discomfort. More extreme eye injuries can result in permanent blindness.
The milk theory is based on the belief that when welders drink milk, the calcium in the milk will “saturate the body” and prevent the body from absorbing toxic heavy metals that can be found in welding fumes, such as cadmium.
