To "buff" anything is to polish it using a cloth wheel soaked with cutting compounds or rouges to bring out the shine in materials like metal, wood, or composites. The compound accomplishes the cutting, while the cloth buff only "carries" it.
This method, known as "polishing" in the business world, involves the use of abrasive belt finishing. There are two distinct steps involved in the buffing process: the cut buff and the polish. Pits, coarse abrasive polishing lines, and deep scratches cannot be removed with even the cut buff, the coarsest buffing operation. That's why it's so important to clean and smooth the surface before buffing if you want a high-gloss result. Using the finest abrasive belt that manufacturing will permit is the first step towards excellent pre-buff surface preparation. This is when we start buffing off the remaining scratch line from the initial damage.
After the first "scratch" or polish, one or two further polishing stages are performed. When working with metals, it is best to cross-polish the abrasive lines and buff off grits of 400 or finer. The cut buff may be used to get rid of the final polishing lines, although it might not be as bright as is needed. The shine will be created by using a finishing buff.
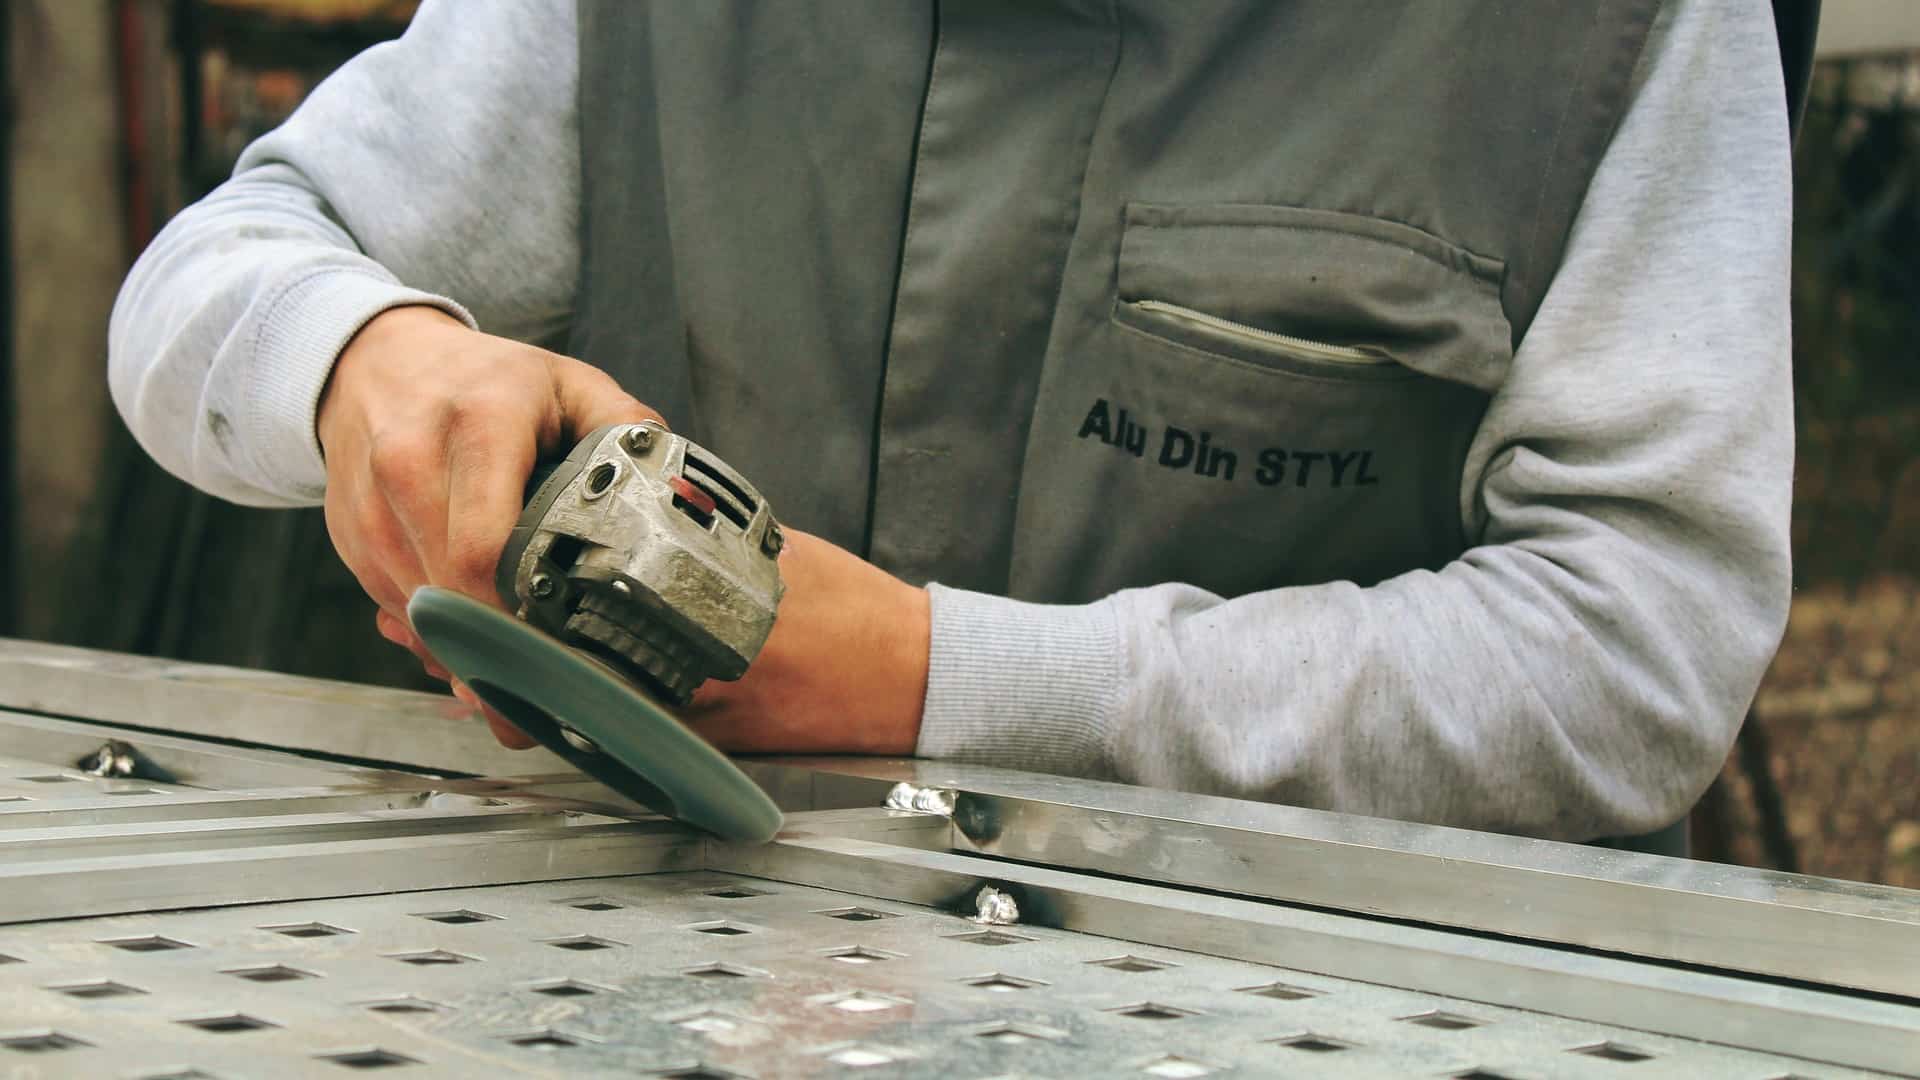
Using wheels and compounds to buff and polish is similar to using wet and dry sandpaper, but it goes much more quickly. To get the job done quickly and efficiently, an electric motor is used instead of human muscle. A thin coating of compound (sandpaper) is transported to the component through the "sanding block" that is the wheel's face.
Buffing is meant to smooth out rough spots, but not all components have the same finish and need the same amount of attention. Buffing may be broken down into many subprocesses, including cut-down buffing for initial smoothness, cut-and-color buffing for smoothness and lustre, and satin finishing.
Table of Contents
Can You Put a Buffing Wheel on a Bench Grinder?
A buffering wheel may be attached to a bench grinder, as shown here. Almost any handyman could do the procedure in a matter of minutes. However, there are some more details to consider before making the change.
First, the side of the bench grinder on which you want to instal the buffering wheel may have a reverse thread. You should be careful while threading the wheel and the bolt if there is.
Second, you may not have enough room on the bench grinder to fit a buffering wheel and polish all the angles on your product. You may do this by installing an additional wheel, an arbour extender, or a spacer.
Third, 8-inch wheels are preferable than 6-inch ones, but the latter might still be useful in certain situations. You must be careful not to use too much force.
Fourth, not all motors are created equal; using too much force can cause your wheel to slow down and not perform as well as it might. The ability to counteract this may be at your disposal with the help of a bench press with different speeds. Check out Best Plasma Cutter Reviews Australia: Top 8 of 2020
What Is a Buffing Wheel?
When you're just getting started, it's smart to review the basics. What exactly is a buffing wheel? And if it doesn't do anything useful, why does it even exist? Buffing wheels, which are abrasive wheels filled with a polishing compound, are used to polish metal jewellery. To make a piece of jewellery shine and look smooth, polishing compound is applied to a buffing wheel, which is then spun (either manually or with a large-scale motor polisher).
What Kinds of Buffing Wheels Are There?
Rough-Cutting Abrasive Wheels
For use in removing rough spots and healing deep scars.
It is common practise in metalworking to begin with more aggressive buffing and polishing wheels. They are made of silicon carbide or sturdy rubber and are used solely when the metal being worked on requires a more vigourous buffing to remove scratches and other damage. More abrasive rubber buffing wheels should be reserved for grinding, deburring, and de-scaling in order to remove deeper scratches and sharp edges. Check out our selection of Artifex wheels, which can be used to start the buffing process on anything from the coarsest to the finest of jewellery.
Polishing Discs with Radial Bristles by 3M
An ideal tool for polishing small objects without the use of chemicals
These odd wheels, typically constructed from rubber, are ideal for polishing small, delicate items or those with deep, recessed areas. The abrasive compound is thoroughly blended with the rubber; thus, a separate polishing compound and softer buff are unnecessary to achieve a shiny finish. You can clean those hard-to-reach curves, get rid of the scratches, and finish with a brilliant mirror polish with the help of radial bristle discs, which come in a range of grits that are color-coded for your convenience.
Cylinder, Bullet & Pin Polishers
Suitable for: cleaning those hard-to-reach crevices
Smaller mandrel and handheld tool sizes found in mini bullet and pin polishers are useful when working with intricate, inaccessible details. Useful for cleaning and polishing tight spaces, these tiny implements are a must-have. Any part of a smaller piece, or the whole thing, can benefit from their application. To avoid having to switch back and forth between a large and small tool, you could try using the flat edge of a small pin polisher to give the whole thing a final shine. These miniature buffing tools, like the 3M radial bristle discs, come pre-impregnated with abrasive compound, so you won't need any additional polishing compound. Miniature pin polisher sets are available in a wide range of grits (and corresponding colours), and can be used in conjunction with a hand-held electric polishing motor. Check out Austgens METAL ASSEMBLY
Soft Buffing Wheels and Mops
The goal is to achieve a flawless, polished appearance.
Buffing wheels (also called mops and buffs) are used to retain polishing compounds like jeweler's rouge. Spun mops are then applied directly to the metal to polish it after the compound has been spread. In the final step, a polish is applied using a mop made of muslin, felt, calico, or soft cotton to bring out the shine. The diameters of these buffing wheels vary widely, from 1 to 6 inches. The depth could also shift. Due to the layered nature of cotton or muslin, a thicker mop will be more flexible and allow you to get the most out of the instrument when used in conjunction with a polishing motor.
Remember that if you don't clean your soft polishing mops regularly, the polishing compound you use will harden and reduce the mop's effectiveness.
Matting abrasive wheels
Making a custom matt effect is one of its many uses.
A set of matt-finishing abrasive wheels is an essential tool for giving sterling silver a custom matte finish. They often combine strips of sandpaper with spongy nylon fibres, and come in a range of grades and sizes to accommodate the scope of your project and the level of detail you need to achieve. To get a matte rather than shiny finish, you'll need these specialised buffing tools. Get the latest selection of technique matting abrasive wheels here and apply a matte finish to your latest creations.
You can find buffing wheels in a wide range of materials and designs, each one optimised for a specific task. For your convenience, we have compiled a list of available buffing and polishing wheels to help you make your final decision.
There are three common types of centring used in the production of wheels and buffs, and each has its advantages depending on the intended application or piece of equipment. Having a sewn leather core strengthens and lengthens the life of a buff. Plastic centres are just as long-lasting as their lead predecessors, but pose no health risks. Last but not least, shellac centres are cheap and offer a secure fit on a variety of tapered spindles.
Cotton and Muslin Buffs
Cotton muslin type buffs are often used with paint to get a high gloss finish. Muslin buffs, like chamois and cotton flannel buffs, are made of cotton and may be used for comparable purposes. These buffs come in a wide range of sizes, from little 1 inch diameter buffs to jumbo 6 inch diameter buffs. The number of layers of muslin used in the buff, designated by the "ply" grade, is used to determine the breadth of the item. Plies typically vary from 30 to 60. The buff may be used for a variety of purposes because to its adjustable thickness and width (depending on the number of plies). The many kinds and varieties of these buffs are detailed below; nevertheless, regardless of the style, you may choose between a combed and uncombed version. The distinction just indicates whether or not the buff requires breaking in. It is not necessary to "break in" a combed buff, and you also won't have to comb it to keep compound in the wheel.
These muslin buffs are uncombed, making their surface rougher than the conventional combed muslin buff. Use them with an abrasive compound, and they'll do wonders for rough finishing and getting rid of scratches on your workpieces.
When using polishing chemicals, the stitched type buffs are the buffing wheels to utilise. The stitching makes the buff more rigid, so you can exert greater force while using it. The amount of rows of stitching varies from buff to buff; the more rows of stitching, the more rigid the buff will be.
A loose, unstitched buff will be incredibly comfortable and easy to mould to your head and neck. Use polishing chemicals, such as jeweler's rouge, and they become ideal for final touches. These buffs are ideal for polishing items with curved edges and curves since they are loose, sometimes called unstitched, and may easily adapt to whatever you are polishing when pressure is applied. Furthermore, they generate far less heat than a conventionally sewn buff.
Muslin buffs that have been treated tend to last longer and retain compounds better than untreated buffs. Treated buffs are available in a broad variety of grits and hardnesses, making them suitable for anything from heavy-duty buffing to fine finishing. To get rid of any lingering scratches before finishing with a Tripoli or other mild abrasive compound, you may use the chemkote yellow buff, which is a more aggressive buff.
Check out What is the best respirator for welding?
Felt Buffing Wheel
Wool felt is forcefully compressed to create a thick material used to make felt buffs. These wheels have a moderate hardness, making them ideal for general buffing and polishing. They come in a variety of hardnesses from medium to exceptionally hard, can be used with any compound for cutting or polishing, and are excellent for navigating tight spaces because to their ability to maintain a sharp edge. You can use most felt buffs on tapered spindles since they have a pinhole in the middle.
Satin/Matte Buffs
Buffs with a satin or matte surface are often constructed from synthetic or nylon fibres impregnated with an abrasive substance like silicon carbide or aluminium oxide. These buffs are great finishing tools when a high lustre finish isn't wanted, since they can be used to produce a nice brushed effect on watch bands and other things. You may use some of these buffs on plastic, wood, and other materials as well.
Aluminum Oxide Polishing Wheel
These flap wheels are a dual-purpose kind of buffing wheel because the aluminium oxide abrasive granule that gives the wheel its name is embedded into the wheel itself. These wheels are so flexible that they may be used for everything from deburring and polishing non-ferrous metals to sprucing up watch bands. It is also possible to use them to swiftly remove surface impurities from steel and to achieve a satin finish.
Carbide Buffing Grinding Wheel
Extremely durable and more effective as a grinding wheel than a polishing wheel, silicon carbide wheels are a great investment. Light grinding, deburring, smoothing, and cleaning of all non-ferrous metals and non-metallic materials like glass may be accomplished using these tools.
Nylon Polishing Wheel
Cleaning, deburring, and smoothing rough surfaces are typical applications for the nylon and wire mounted brushes. Nylon brushes with particularly gentle bristles may be used for polishing as well. These polishing wheels may be purchased either pre-mounted on mandrels or unmounted so that they can be used with different machinery.
The bristles of the brushes may be constructed of a variety of materials, the most common of which being nylon, brass, and steel. Depending on the job, a certain bristle type may be preferable. It's recommended to utilise steel wire bristles while working with white metals like silver, white gold, platinum, and aluminium, while brass wire bristles may be used for gold, copper, and brass.
How to Use a Buffing Wheel on a Bench Grinder?
When utilising a buffing wheel on a grinder, safety must always come first. Maintaining a secure environment is vital. Make sure the grinder is safely fastened to your workstation and that you're wearing protective eyewear.
Next, you should avoid having anything pointy near the wheel, since this may create a lot of issues. Then, make sure the object you're polishing stays cold. Put some water in a dish or glass and have it close by so you may chill the piece by dipping it.
The compound or paint itself is not being transferred to the surface; rather, it is being transferred to the buffing wheel. It acts as a medium via which the abrasive substance may be transferred to the work surface. Due to the construction of the buff being crucial to the intended performance, it is essential that the buff and the workpiece be a good fit.
A harder buff is more forceful and less pliable than a softer one. It works well on horizontal surfaces. As a softer buff is more pleasant to use and less forceful, it is better suited for workpieces with a more intricate design.
Treatment of the cloth or sisal used in the production of Sisal and Airway ventilated buffs is done at the factory by immersing it in water or solvent-based resins. Different manufacturers use different colours to denote different levels of stiffness. The treatments make the buff more rigid, sturdy, and lubricated.
As a rule, the more rigid the buff, the quicker it will cut. Stiff treatments are often applied to flat surfaces that need very little bending. For more intricate sections or to reach farther into a space, gentler treatments are applied.
In certain contexts, automated machines may replace a large number of buffs by cutting, shaping, blending, deburring, and finishing all in one step. When buffing by hand, a cut buff and a finish buff are the usual order of business.
Different kinds of cut and finish buffs made from different kinds of textiles or sisal are readily available nowadays.
, built using a wide range of stitches and materials. In this article, I'll explain why and how often you'd employ the most popular buffs.
Bench grinders can easily converted into formidable buffering machines. The buffering wheel must be tightened to a point where it is not dangerous to operate. In addition, maintain a container of water, such as a glass, jar, or bowl, close by.
The polishing object may be cooled down and you can avoid being burnt in the process. To safely polish a wide variety of goods, just remember the fundamental rules for using bench grinders.
How to Convert Bench Grinder to Buffer?
Changing the wheels on a bench grinder to make it work as a buffer is just half the battle. Getting the pieces to fit and function correctly requires some effort and creativity.
Here's one method you may use in your own garage to make the change:
- Attach the grinder with bolts to a workbench or other stable wood surface. You'll have more steadiness while working because of this.
- The next step is to take off the wheels and any protective wheel protectors. When you get to the point when nothing is left except the engine and the wheels, you're done.
- Sometimes, you'll need to trim the axle to fit, in which case you'll want to use a hacksaw with a sturdy blade. Turn on the grinder engine and centre the hacksaw blade on the rotating axle for simple, quick work. Handle not bother yourself with the task at hand, and instead let the axle do it.
- Once the axle has cooled, simply fit the spindle of the buffering wheels over the axle and tighten the nut.
- It's possible that the other axle, on the other side of the bench grinder, is too thick to securely connect a spindle. Here, a lathe chisel's hardened tip is clamped in a vice.
- Start the engine and position the pointed end of the tool adjacent to the rotating axle.
- Remove the excess thickness from the grinder's axle by slowly and gently scraping it with the hard tip. Take care to remove precisely the right amount of material so that the spindle fits snugly.
- Install the spindle and tighten the screws when the axle has cooled.
- Buffer wheels are an essential tool for making quick work of polishing.
Conclusion
Buffing is a method of polishing metals, woods, and composites to a high sheen using a cloth wheel doused in cutting compounds or rouges. There are two distinct phases involved in abrasive belt finishing: the cut buff and the polish. To get a mirror finish, you should cross-polish the abrasive lines and buff off grits of 400 or finer after thoroughly cleaning and smoothing the surface. There are numerous steps that can be taken to achieve the desired level of smoothness and shine when buffing, such as cut-down buffing for a basic sheen, cut-and-color buffing for a more refined sheen and shine, and satin finishing. Adding a buffering wheel to a bench grinder is possible, but there are some factors to think about first.
When it comes to polishing metal jewellery, nothing beats the results you get from using a set of buffing wheels. They are used to smooth rough spots and heal deep scars, and they are made of silicon carbide or sturdy rubber. For more severe scratches and jagged edges, you can use them for grinding, deburring, and de-scaling. To begin the buffing process, even the roughest and finest jewellery can be run through Artifex wheels. If you need to polish a small object without resorting to chemicals, 3M's Polishing Discs with Radial Bristles are a great option.
You can clean and polish tiny, hard-to-reach areas with the help of a miniature bullet or pin polisher. You can use a hand-held electric polishing motor with a set of miniature pin polishers that have already been impregnated with abrasive compound. To apply a polish, a mop made of muslin, felt, calico, or soft cotton is used to retain polishing compounds like jeweler's rouge. To achieve a unique matte finish, sterling silver requires a set of matt-finishing abrasive wheels.
There is a wide selection of buffing and polishing wheels on the market, each one designed to perform a particular function optimally. A sewn leather core, plastic centre, or shellac centre are the three most common types of centring used in manufacturing wheels and buffs. Materials: Cotton and Muslin Stitched type buffs are the buffing wheels to use when using polishing chemicals, and buffs are commonly used with paint to achieve a high gloss finish. Cotton buffs can be used with an abrasive compound to rough finish and remove scratches from workpieces; their uncombed surface makes them rougher than the standard combed muslin buff. When polishing objects with rounded corners or curves, a loose, unstitched buff works best because it can be shaped to fit the user's head and neck and produces much less heat than a tightly sewn buff.
Buffs that have been treated can range from rough buffing to smooth finishing because they come in a wide range of grits and hardnesses. Wool felt is used to make buffing wheels, while synthetic or nylon fibres impregnated with an abrasive substance like silicon carbide or aluminium oxide are used to make satin/matte buffs. Because of their versatility, aluminium oxide polishing wheels are used for a wide variety of tasks, from deburring and polishing non-ferrous metals to restoring shine to watch bands. Buffing steel with carbide wheels gets rid of surface rust and scratches while also giving it a satiny sheen. For light grinding, deburring, smoothing, and cleaning of non-ferrous metals and non-metallic materials like glass, silicon carbide wheels are an excellent investment.
They can be purchased with or without mandrels, depending on the type of equipment you intend to use them with. Brushes can have bristles made from nylon, brass, or steel; when working with white metals like silver, white gold, platinum, and aluminium, steel wire bristles are prefered. Brass wire bristles can be used with gold, copper, and brass. Because it serves as a conduit for the abrasive substance to be transferred to the work surface, safety must always be prioritised when using a buffing wheel on a grinder. It is recommended to use a harder buff on more intricately designed workpieces because it is more forceful and less flexible than a softer buff. As long as the wheel is tightened to a safe level and a water container is kept nearby, a bench grinder can be used as a buffer.
You can find a variety of cut and finish buffs in stores, some of which are made from sisal and others from various textiles. Remembering the basic rules for using bench grinders will allow you to safely polish a wide variety of goods. It takes some ingenuity to convert a bench grinder into a buffer by switching out the wheels. Bolt the grinder to a workbench or stable piece of wood, remove the wheels and any protective wheel protectors, cut the axle to length, power up the grinder, and position the hacksaw blade in the centre of the rotating axle. When the axle of the grinder has cooled, you can use the hard tip to scrape away any excess material, and then you can install the spindle and tighten the screws. There is no faster way to polish than with the help of buffer wheels.
Content Summary
- To "buff" anything is to polish it using a cloth wheel soaked with cutting compounds or rouges to bring out the shine in materials like metal, wood, or composites.
- This method, known as "polishing" in the business world, involves the use of abrasive belt finishing.
- There are two distinct steps involved in the buffing process: the cut buff and the polish.
- Using the finest abrasive belt that manufacturing will permit is the first step towards excellent pre-buff surface preparation.
- The shine will be created by using a finishing buff.
- Using wheels and compounds to buff and polish is similar to using wet and dry sandpaper, but it goes much more quickly.
- Second, you may not have enough room on the bench grinder to fit a buffering wheel and polish all the angles on your product.
- The ability to counteract this may be at your disposal with the help of a bench press with different speeds.
- When you're just getting started, it's smart to review the basics.
- Suitable for: cleaning those hard-to-reach crevicesSmaller mandrel and handheld tool sizes found in mini bullet and pin polishers are useful when working with intricate, inaccessible details.
- To avoid having to switch back and forth between a large and small tool, you could try using the flat edge of a small pin polisher to give the whole thing a final shine.
- The goal is to achieve a flawless, polished appearance.
- A set of matt-finishing abrasive wheels is an essential tool for giving sterling silver a custom matte finish.
- You can find buffing wheels in a wide range of materials and designs, each one optimised for a specific task.
- For your convenience, we have compiled a list of available buffing and polishing wheels to help you make your final decision.
- There are three common types of centring used in the production of wheels and buffs, and each has its advantages depending on the intended application or piece of equipment.
- The many kinds and varieties of these buffs are detailed below; nevertheless, regardless of the style, you may choose between a combed and uncombed version.
- It is not necessary to "break in" a combed buff, and you also won't have to comb it to keep compound in the wheel.
- When using polishing chemicals, the stitched type buffs are the buffing wheels to utilise.
- A loose, unstitched buff will be incredibly comfortable and easy to mould to your head and neck.
- Wool felt is forcefully compressed to create a thick material used to make felt buffs.
- These flap wheels are a dual-purpose kind of buffing wheel because the aluminium oxide abrasive granule that gives the wheel its name is embedded into the wheel itself.
- Extremely durable and more effective as a grinding wheel than a polishing wheel, silicon carbide wheels are a great investment.
- When utilising a buffing wheel on a grinder, safety must always come first.
- As a softer buff is more pleasant to use and less forceful, it is better suited for workpieces with a more intricate design.
- Treatment of the cloth or sisal used in the production of Sisal and Airway ventilated buffs is done at the factory by immersing it in water or solvent-based resins.
- The treatments make the buff more rigid, sturdy, and lubricated.
- When buffing by hand, a cut buff and a finish buff are the usual order of business.
- Different kinds of cut and finish buffs made from different kinds of textiles or sisal are readily available nowadays.,
- Bench grinders can easily converted into formidable buffering machines.
- To safely polish a wide variety of goods, just remember the fundamental rules for using bench grinders.
- Changing the wheels on a bench grinder to make it work as a buffer is just half the battle.
- Here's one method you may use in your own garage to make the change:
- Attach the grinder with bolts to a workbench or other stable wood surface.
- The next step is to take off the wheels and any protective wheel protectors.
- When you get to the point when nothing is left except the engine and the wheels, you're done.
- Sometimes, you'll need to trim the axle to fit, in which case you'll want to use a hacksaw with a sturdy blade.
- Turn on the grinder engine and centre the hacksaw blade on the rotating axle for simple, quick work.
- Once the axle has cooled, simply fit the spindle of the buffering wheels over the axle and tighten the nut.
- It's possible that the other axle, on the other side of the bench grinder, is too thick to securely connect a spindle.
- Install the spindle and tighten the screws when the axle has cooled.
FAQs About Metal
Can you put a buffing wheel on a bench grinder? As you can see, it is possible to put a buffering wheel on a bench grinder. The process is not that difficult, and any handyman can do it in a few minutes.
Buffing Wheels are finishing tools for smoothing the surface of a workpiece. The buffing wheel provides smooth satin finishing on the metal surfaces. It is too easy to make smooth, finish, mix, or polish almost any surface with the help of buffing grinder wheels.
Buffing is usually a final process using abrasives or abrasive compounds that adhere loosely to a flexible backing, such as a cloth wheel. Buffing is used to generate extremely fine surfaces that match those associated with honing and lapping. A buffed surface is typically smooth, highly reflective and mirror-like.
Buffing is a surface finishing process to shine metal, wood, or composites. It levels out the residues or excess of products to provide a smooth surface and look. The buffing process usually uses a cloth wheel impregnated with loose abrasives as cutting compounds.
Buffing pads are circular tools to polish paint and other hard materials, such as metal. They're most commonly made of foam, wool, or microfiber. Some pads are meant for manual use while others attach to power tools. They can also be useful in applying wax or sealant.